It's been a bit since I posted a blog, but that's not because I'm not doing anything on the Mayflower - I've been busy at work and have only been doing a bit here and there. Now that I've got a few of the additions done - the beakhead and extending the Quarter Deck - I've finally forced myself to download all the pictures and put them up.
First up is the beakhead, which is basically the piece that sticks out on the front of the ship.
The kit came with laser cut pieces for the stem knee and the 2 sides of the beakhead.

The stem knee glued in position:
The stem knee stained the same colour as Colonial Walnut that I used for the main part of the ship's body:
While staining the stem knee, and waiting between coats for it to dry, I started to work on the outer frames by applying some planking. Only 1 side of each one is actually planked - the side that will face out; the side that faces in will simply be stained.
As you can see from this photo, my first attempt didn't turn out that well... I tried to bend the wood to match the curve of the frame, but the pressure was too much and it snapped the frame...
My second attempt was much more successful. After creating another frame from some scrap wood, I attached the planks at an angle, and then, after the glue had dried, cut out the opening. Most of the frames will be painted, plus the beakhead is at a slight angle, so the angle of the planks will look okay.
The planked and sanded beakhead frames. The 2 pieces on the right of the picture are the walls for the Quarter Deck, which I was working on at the same time (that will be the next blog post).
Priming the frames (and staining the Quarter Deck walls). The tops of the beakhead frames will be stained Colonial Walnut, so taped over those areas while doing the priming. You can also see two of the strips that will be used for trim work later.
Staining the inside of the frame:
The inside and outside of the frames, fully painted and stained. Trim work will be added to cover up the edges of the differently pained areas.
This pictures a little blurry, but you can see the curved and stained strip of wood that will go on top of each frame.
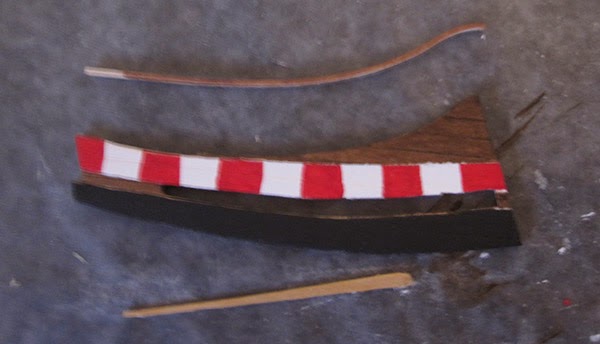
The primed and then painted trim work for the beakhead:
The trim work attached to the frames:
The first side glued in place:
The other side:
The temporary bowsprit in place - this is just a short piece of scrap wood I'm using to see how it all looks. The actual bowsprit will be longer:
The front of the beakhead painted black:
Adding the trim work to the front. I fixed the angle of a couple of the strips after taking this picture. They still look a bit off in the second picture, but look good to the naked eye...
Painting some of the edges on the bottom of the beakhead:
When I added the frames, I didn't actually get the angle correct, so there was a bit of a gap at the bottom on both sides. I "fixed" this by adding some additional trim work which wasn't part of the original planes.
Adding some frames:
Staining the stanchions, which will sit on top of the newly added frames:
The stanchions in place:
The stanchions as seen through one of the frames:
A few of the bottom pieces for the beakhead (the odd shaped ones are "knees"), stained and waiting to dry before being attached:
The knees and trim work added to the bottom of the beakhead:The rest of the stanchions and an additional frame added:
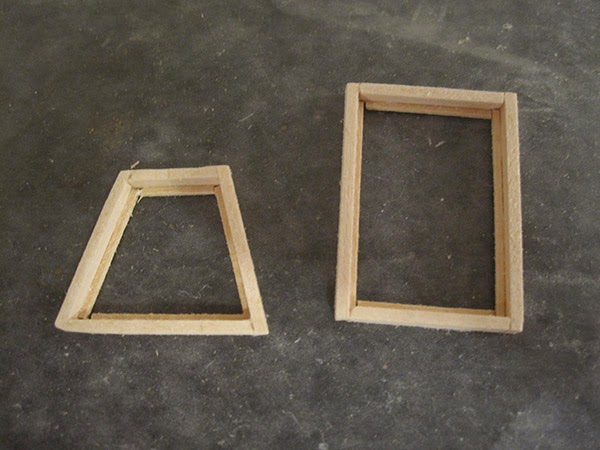
Next up is creating the grating, the same way I did for the hatches on the main deck. The only difference, really, is that this one is not rectangular - you can see the framing just sitting in place in this picture (it's the unstained wood):
Putting it together (the rectangular grate is for the Quarter Deck):
I didn't have any clear shots of the beakhead grate with the inner trim added, but it looked like this:
Staining the grates:The beakhead grate in place:
One of the last pieces for the beakhead was a belaying pin rail. The strips used were fairly thin, so I created two in case one broke when adding the holes. Good thing I did, as one did break when I tried to drill the holes bigger... For the second one, I used various sized needles to carefully expand the holes until they were large enough to take the belaying pins.
The pin rack in place, with 3 pins added (there are 6 holes, but not all have pins in them, according to the plans and pictures). The plans said not to glue the belaying pins in place yet, but I looked and couldn't see a step anywhere telling me when to glue them so I left them there. They aren't glued, but are in the holes quite tight, so won't come out. Plus, when reading the instructions and looking at the plans, I think will be okay adding them now, and they won't cause any problems later.
The finished beakhead - after adding the pin rack, I added a small piece of wood as a brace in the centre (it's hard to see in the pictures) and also 4 planks of wood running out to the grate (this is what sailors would use to cross the gap).
You can see a bit of a gap at the front where the trim work didn't quite line up. It's only really noticeable if you get under the model and look at it at just the right angle, so I'm just going to leave it as is.
And lastly, a side view with the real bowsprit just sitting in place to give an idea of how it will look when finished. This won't actually be permanently attached until later, and there is still lots of work to do on it (shaping, staining, adding some features to it, etc), but it is pretty much the correct angle and length.
Oh, and if you look closely, just behind the front of the base is the ship's boat which I am also working on - when finished, this will sit on the grates of the main deck (and will be a post of its own, so there will be better pictures of the various stages... currently I'm stuck on how to sand the insides of it smooth...).


No comments:
Post a Comment