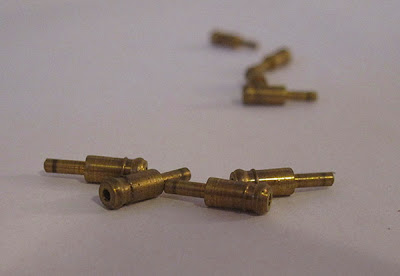
Obviously, gun ports aren't really that useful unless there are guns behind them, so first up was painting the brass cannons which came with the kit. For some kits, the full cannon and its cradle are used, but those are mostly if they will be highly visible. In this case, they will be mostly hidden, so only the ends of the cannons are needed.
I drilled some holes in a strip of scrap wood to hold the cannons while I primed and painted them:
Before I could attach them, I needed to drill holes in the cannon support strip I added when I was starting the model. If I had been thinking, I would have drilled the holes back when I was painting the strips...
The dummy cannons glued in place:
For the gun port covers, I glued together some strips of wood that I had left over from the planking; the strips were all about twice as long as I needed, but since I didn't do the second layer of planking on the bottom part of the hull, I should have plenty.
Later, the narrower strip will be attached to the wider one; the narrow part will be the inside section, which should fit into the gun port holes, while the wider part is slightly larger than the holes.
Staining the strips the same colour as the hull (Colonial Walnut):
Putting the strips together (the numbers on the paper refer to the gun ports). Of course, I'll need to do some additional staining:
A few strips of brass came with the kit to create the hinges on the hatches (not sure why they didn't supply these for the door hinges). I first painted the length of strip I needed black, and then cut them to length; for me, it is easier to do it that way and then touch up the paint then to try to paint the smaller strips when they are attached.
The upper left hinges are just sitting on the hatch, which is why they aren't quite straight.
All of the hinges attached:
Eyebolts painted, cut to length and added to the hatches to act as handles:
It's hard to see, but here is where I started drilling holes so I could attach the hinges:
There are a number of ways to add the hatches - open, closed or a mix - but I went with having them all open:
And that pretty much brings everything up to date, although I did start some work on the beakhead while I had the drill out:
Starting the hawse holes (I started with a small drill bit and worked my way up to the size I needed):
Starting to make the hole for bowsprint. It is awkward to get at, even though it is not in the centre of the beakhead (it's to the starboard side of the stem):
Test fitting a scrap dowel in the bowsprint hole - it is the same diameter as the final bowsprint will be, but not as long:
It looks like it is at quite the angle compared to my other models, but it looks right compared to the plans and the pictures with the kit.
Widening the hole a bit:
And that brings this blog up to date. Next up will be cleaning up those holes I drilled in the bow and then building the beakhead. Since the beakhead will need some staining and painting, I will also probably work on extending the quarter deck out over the capstan at the same time, and maybe even start building the boat that will sit on the main deck grates.


No comments:
Post a Comment