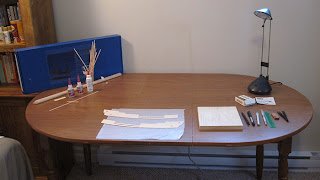
With the deck bulkheads mostly all in place, it was time to once again clean up my work area a bit before moving onto the bulwark templates.
Basically, the bulwark templates are two laser cut pieces of thin wood which are used to help form the shape of the upper hull. You may remember I actually used them way back to align the first of the hull planking; now it is time to do some work on them and then attach them permanently to the upper hull.
The first step was to plank the sides which will face inward (the outside will be done later). This was pretty straight-forward as, for the most part, I used full length strips. After shading the edges, it was just a matter of bending them to match the curve of the template. The first one on each template took a bit of work to get just right, and after that they all fell into place.
As you can see, there were a few strips on each side where I didn't use full strips - these were where I had to do some trimming to allow the strips to fit nicely around the holes in the template. This was much easier then using a full strip and trying to get all the holes lined up, and the joints will be mostly hidden later below one of the decks I'll be extending; I cut one of the joints at the opposite angle by mistake, but since it will be hidden...
Once they were both planked, I trimmed the edges a bit and then stained them the same colour as the decking.
Once they were both ready, I attached them. This was tricky as the curve needed to follow the top hull plank I had added earlier, and the shape had to align with the various deck bulkheads. Getting them exactly where I needed them and holding them in place took a bit of work, but it turned out pretty good.
Attaching the first side:
The stern attached, complete with windows created the same way I did the other ones, and glued to the inner side of the templates. To be honest, I forgot to do them... but I was having problems with the template sticking, so was able to add them in later... I still forgot to paint it black behind them... luckily the bottom windows are over a gap in the hull bulkheads, so it is naturally dark, and the upper don't look too bad...Attaching the first side:

Both sides attached:
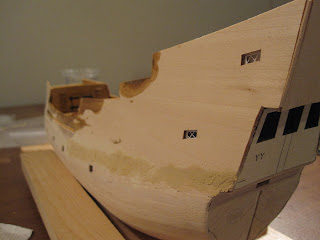
After they were attached and the glue had dried (after a day or two), I used wood filler to fill the gaps between the templates and the first of the hull planks and also to smooth out the curve a bit where they met (once attached, the templates were about a millimetre wider then the original planking). The entire upper section will be covered with a second layer of planking later, so I'm not worried about the amount of wood filler as it will all be sanded smooth and really isn't that much, despite how the pictures look (it's a little wide, but thin).
Next up was fixing the bow. If you recall, the top plank on one side wasn't quite even, so I filled it in with a scrap plank, then added another plank to both sides to bring it up to the level of the bow's deck (the beakhead).
Planks added, with a bit of wood filler:Test fitting the beakhead bulkhead (say that 5 times fast...):
Adding the deck to the beakhead:
After trimming the planks and adding the treenails (I've also stained it, but don't have any pictures of the finished deck):


No comments:
Post a Comment